Sessions, recordings and files
Make a session
Press + Session in the sidebar, the + beside the session tabs, or New session on a phone's bottom bar. The new-session screen opens.
A session you open from the sidebar shows in an italic tab: a preview that the next session you open replaces. Double-click the tab (or double-tap it) and the text turns plain, which keeps it open. On a phone there is no preview tab: every session you open stays open. The tab strip shows whenever a session is open, even with only one, and every tab has an × to close it. Closing the last one on a phone takes you to the Library, on the folder that session lived in; on a computer it opens the new-session screen. Right-click a tab (press and hold on a phone) for Close, Close Others and Close All.
At the top of a session, the folder it lives in is written as a path (Cars / Suburban). Press any part of it to open that folder in the main pane, with the folder's other sessions to go on with; the session stays open in its tab. On a phone there is also a ‹ row above the path with the folder's name (‹ Suburban, or ‹ Library for a session in no folder): one press goes back to that folder.
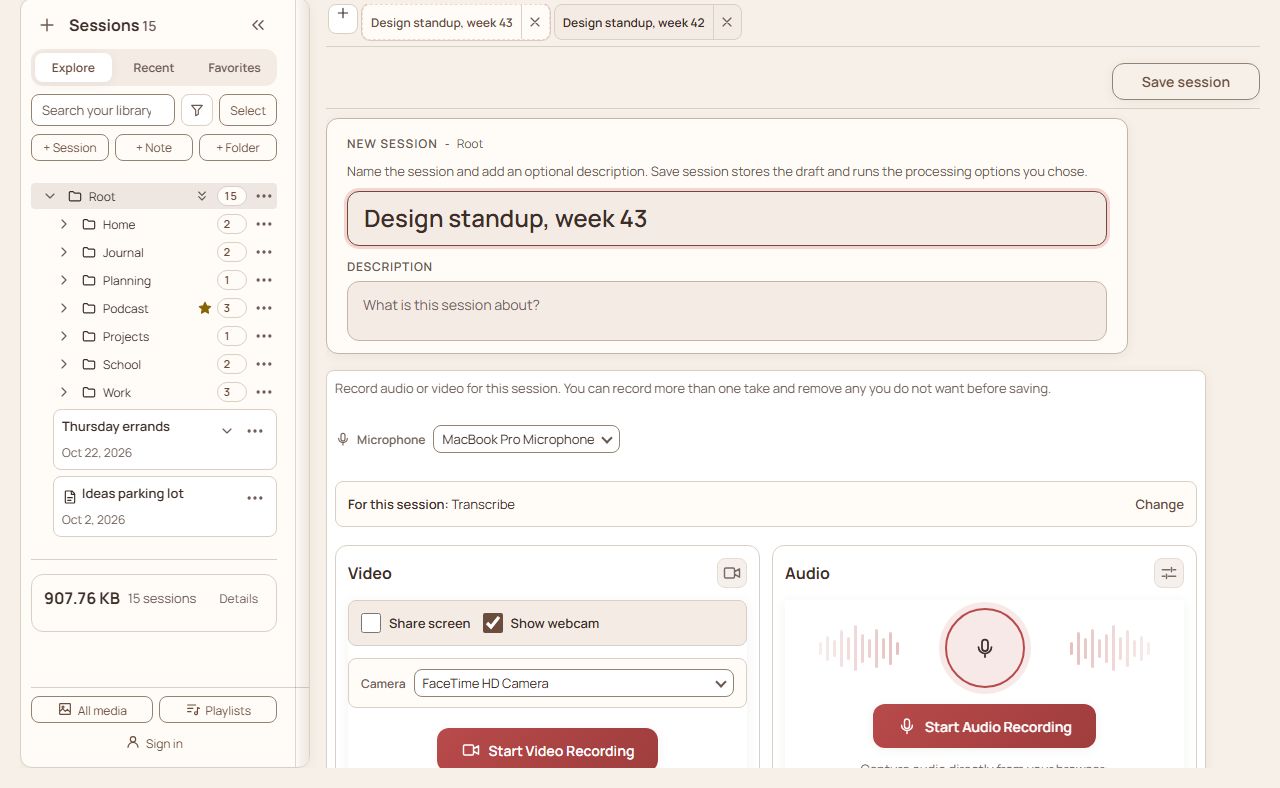
- Give it a title and, if you like, a description (what it is about).
- Record, upload, or both. Nothing is saved until you press Save session (or ⌘/Ctrl+Enter).
- Press Save session. It opens in its own tab.
While nothing is waiting to be saved, Save session is an outline and the record button is the one to press. The audio recorder comes first (on a phone it is on the first screen), with the video recorder under it. What happens after saving is one line, such as For this session: Transcribe; press Change to see all four options.
You can also just name it and save: a session does not need a recording. Import session…, at the bottom of the screen beside the upload buttons, brings in a session exported earlier as a .zip.
Record or upload
- Video records your camera, your screen, or both (Share screen, Show webcam). Audio records the microphone you pick under Microphone. The microphone and camera lists are the app's own dropdowns, the same as every other list.
- While you record, the clock at the top right shows how long the take has run, for audio as well as video, and a pause says Paused in words beside it. The level meter stays under it, so you can see the microphone is hearing you.
- Video is recorded at 1080p, 30 frames a second. There is no quality setting to choose.
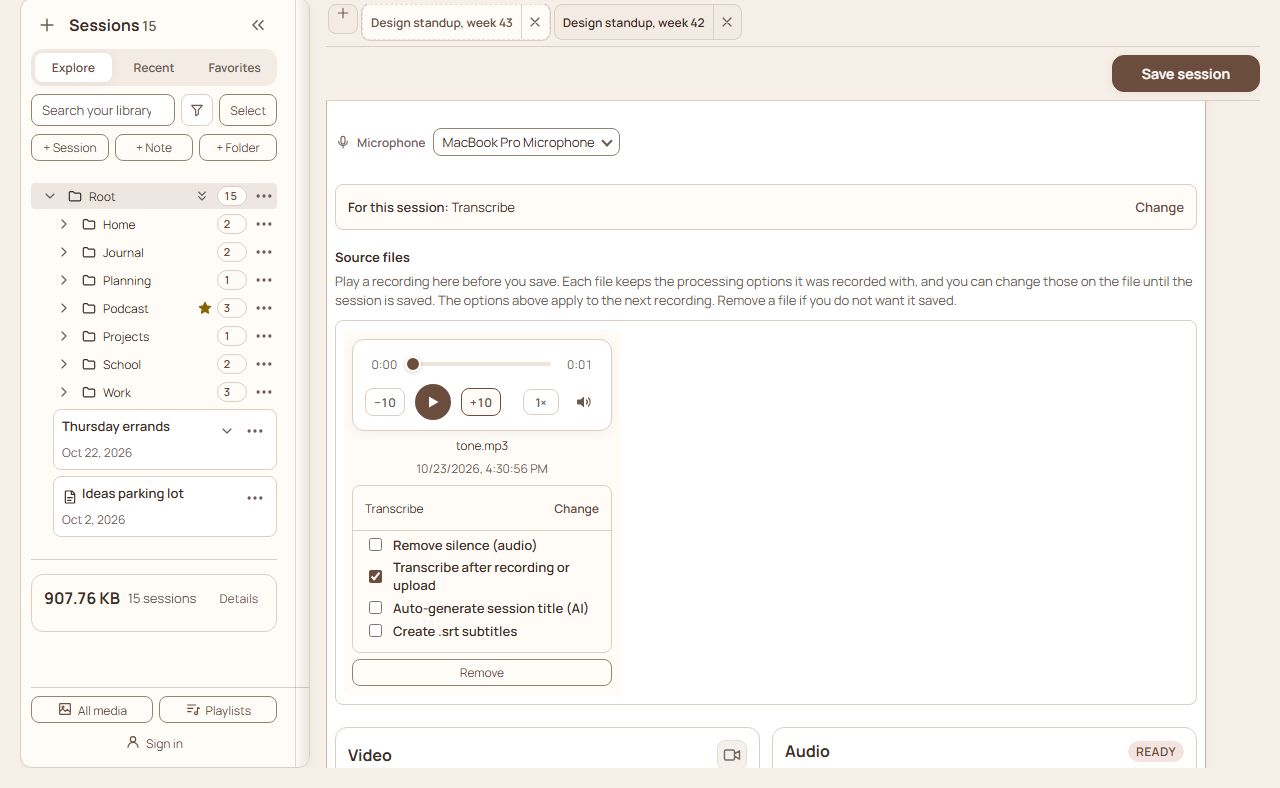
- You can record more than one take, listen to each before saving, and remove the ones you do not want.
- Upload file…, Upload video and Upload audio add files you already have. Several at once is fine: hold ⌘/Ctrl or Shift when picking.
What happens to a recording
Each file carries the choices you made, shown as one line (for example Transcribe) with Change beside it; press it to see the four options and change them before saving:
- Remove silence (audio) cuts the quiet parts so less audio is sent for transcription.
- Transcribe after recording or upload turns speech into text. It is one setting: the same as the Transcribe switch next to the upload buttons and the default under Settings › Recording, so changing it in one place changes it in all three.
- Auto-generate session title (AI) names the session from what was said.
- Create .srt subtitles makes a subtitle file with timings.
Your session
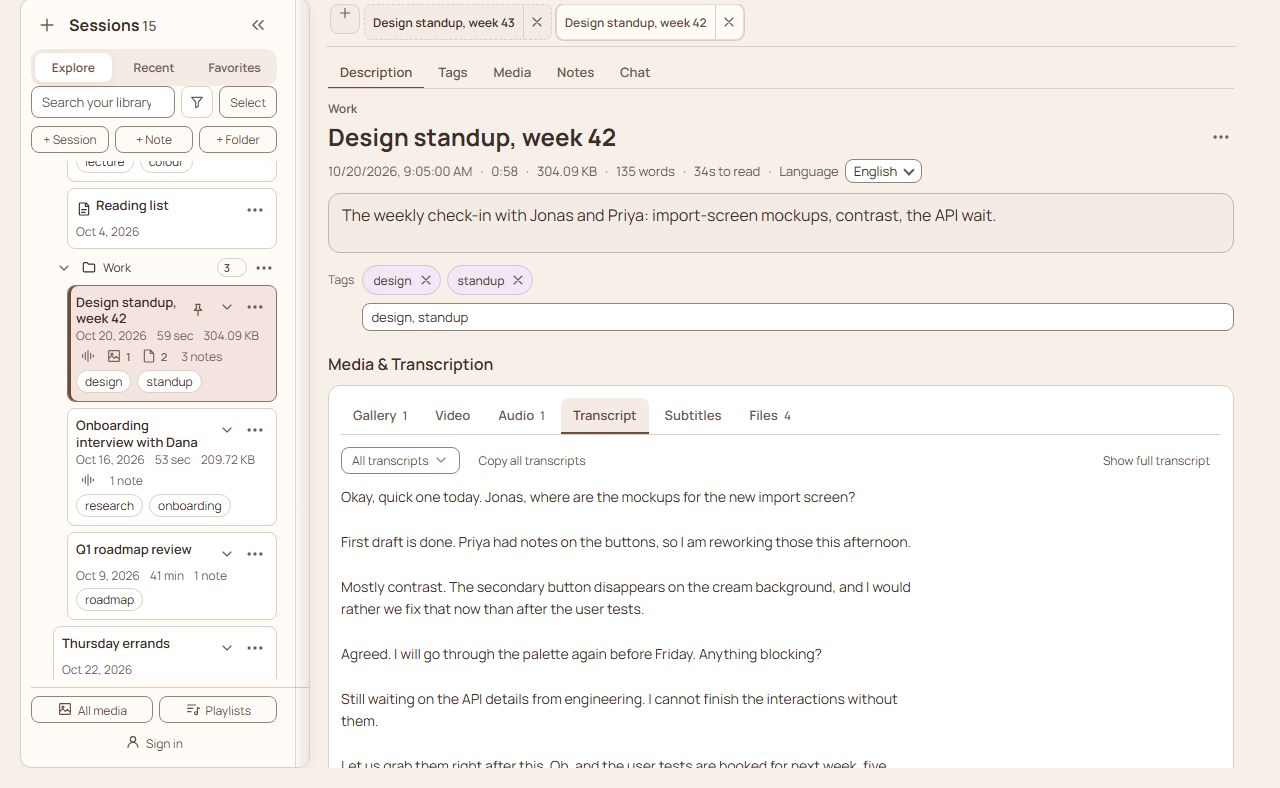
- The title is the largest text on the page, with the description under it. One quiet line between them gives the facts: when it was made, how long it is, its size, and the word count and reading time once there is a transcript (plus the AI cost, if you turned Show AI cost on in Settings › AI usage). Language is on that line: pick the language that was spoken (it opens a searchable list). A Transcription: note appears beside it only when the language found in the transcript is not the one you chose. A Locked tag sits beside the title while the session is locked.
- The ⋯ menu beside the title holds everything else: pin, rename, Generate AI title (it names the session from its transcript, or from its notes or chats when there is no transcript, and only asks which to use when there is more than one to choose from), summarize, export, make, upload, replace or remove a thumbnail, lock, hide from AI apps, or delete the session. The thumbnail and the AI title each have this one place.
- Tags sit right under the description: type a tag and press Enter, or tap the × on one to take it off. The Tags link in the bar at the top of the session goes there.
- Record video and Record audio start recording at once, after a short countdown. Stop, then Add to session. A session with nothing in it opens on Files, where Upload file…, Record audio and Record video sit together; a session with media opens on its video, audio, transcript or subtitles.
- Media & Transcription has six tabs in one row: Gallery, Video, Audio, Transcript, Subtitles and Files. On a phone the row slides sideways and keeps the open tab in view. A number beside a tab's name (on Gallery, Video, Audio and Files) says how many it holds; a tab with nothing in it shows none. Files holds everything the session has, photos included; the chips above the cards (All, Photo, Video, Audio, Transcript, Subtitles, File) show one kind at a time, with a count on each.
- Gallery shows every photo and video in one grid. Choose This session only, This session and its notes, or a single note. A photo opens large; a video of the session takes you to its Video tab.
- Transcript can be copied, added as a note, edited, downloaded or deleted. Copy is the one filled button; Add as note is outlined, the rest are plain text, and Delete is outlined in red. Add as note says where the note went in a notice at the bottom (“Added as the note …”) with an Open button that takes you to it. With several recordings, choose which transcript to read, or copy them all. Delete on the Transcript, on the Subtitles, and on a recording under its player asks first and names the file, in the same words as Files; it cannot be undone.
- Under a recording's player, Download and Delete are in view, and a ⋯ holds Rename, Copy name, Show in folder and Info.
- Audio and Video can make a cleaner copy: Remove silence on audio, Process video to make a smaller, shareable video. The copy is a file of its own: the recording then shows two cards, Raw audio and Processed audio (Raw video and Processed video), with the same title. The one whose silence was removed is marked Silence removed: a small mark on its card, those words under its facts, and "silence removed" beside the heading of its player. A recording that never had its silence removed carries no mark.
- A video you record or upload is compressed as it is saved, and the session keeps that one compressed video, not the original beside it. If it cannot be compressed (or you chose to keep raw video in Settings), the original is kept as it was and Process video can try again.
- Notes and Chat are further down. The tabs at the top (Description, Tags, Media, Notes, Chat) jump to them.
Playing audio and video
The audio and the video player have the same controls, so what you learn on one works on the other:
- Play / Pause, and a bar with the time at both ends. Drag the bar or tap it to move; with the keyboard, focus the bar and use the arrow keys (5 seconds), Page Up / Page Down (30 seconds), Home and End.
- −10 and +10 jump back and forward ten seconds. They are always there, with no extra arrow to open.
- The speed button (1×) steps through 0.5×, 0.75×, 1×, 1.25×, 1.5× and 2×.
- The speaker button mutes, and on a computer the volume slider is beside it all the time (no right-click). On a phone the volume keys set the volume, so only the mute button is shown.
- The video also has CC for its subtitles (when it has some) and a full screen button.
- Keyboard, with the player in focus: Space or K plays and pauses, ← and → skip, ↑ and ↓ change the volume, M mutes, and on a video F is full screen and C switches the subtitles.
Files of any kind
The Files tab holds everything that is not the session's own recording: photos, PDFs, zips, spreadsheets, text files, the subtitles (.srt), more audio and video. Drop files anywhere on it or use Upload file…, the one filled button in its row (a session with one video shows that video's saved picture on its card); Record audio and Record video are beside it. Tap a file to look at it: a PDF opens in a viewer, a text file shows its text, a picture opens large, a recording plays. A file that cannot be shown here (a zip, a spreadsheet) offers the download. If a file is slow to arrive (one that has to come from the cloud first) the viewer says Loading… with a moving mark, and offers Try again if it never comes.
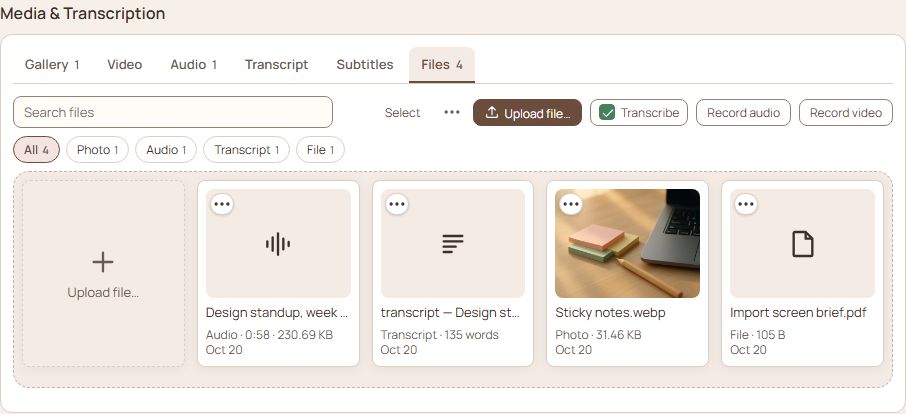
- The dashed + Upload file… card at the start of a tab adds files of that kind (photos on Photos, video on Video, and so on); the same card is on a note's files.
- Each file is a card: its kind and size (or length), and the day it was added, are under its name. Its ⋯ menu can rename, generate a transcript (audio and video), Add to playlist (audio and video), download, move, show its Info, or delete it.
- Select (plain text at the top) lets you pick cards and then Add to playlist (when some are audio or video), Download, Move or Delete them together. While you pick, the row holds only those tools: Upload file… and the recording buttons come back when you press Cancel. Copy all transcripts and Merge into one audio/video are in the ⋯ beside Select, and show only when there is something to copy or merge.
- Move… sends a file to another session, or into one of its notes. Audio and video can be moved into a note too, with their transcript. It is in the menu on the Video and Audio tabs as well as on Files.
- Deleting a recording removes it, and the audio taken from it. A recording kept both as it came and processed (silence removed, compressed) is two cards, and deleting one of them leaves the other.
- Files you add on the Files tab are kept exactly as they came.
- Each file you add shows a row with its name and how far it has got. A file being sent to your workspace folder has a Cancel button: it stops that file, removes it from the list again, and the other files carry on. If a file cannot be added, its row stays, red, with the file's name and the reason, until you press Try again (it adds that file once more) or Dismiss. A row that finished goes by itself after a moment.
Transcribe on upload
Next to every upload button is a Transcribe switch (it sits right beside Upload file…, not beside the Record buttons). It is the same setting as the Transcribe after recording or upload checkbox on the recorder, so the two always agree. With it on, the audio and video you add are transcribed as soon as they are in. It starts as your default for new recordings (Transcribe after recording or upload under Settings › Recording, on unless you turned it off there), and a transcript uses AI credits, so switch it off when you only want the file kept. One switch covers sessions and notes. Reset at the top of Settings › Recording or Settings › AI asks first and says which groups it will put back to their defaults. It only touches the options on that page, never your folder, language, time zone or the other tab.

Tags and language
Add tags to a session under its description (or from its row in the sidebar) and filter by them later. Language, on the line under the session's title, sets what the transcript is written in. Pick the language that was spoken, or leave it unspecified.